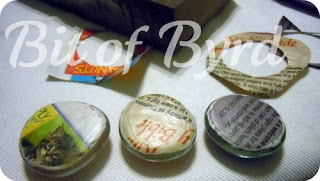
Aren't those cute! And they cost me less than a dollar to make all three!
These glass rocks can be magnets, push pins, or desk trinkets. I did not put the extra stuff to make it a magnet or a push pin... so trinket it is!
I had been wanting to make these a while. My sister last Christmas got a rock painting kit and it was basically these rocks and paint. But they all came out so cute. So when thinking of doing this I Googled to see if anyone had tips. I found Crafty Scrappy Happy's post about it here. She actually did magnets.
So here's how I made mine...
Skill: Easy
Time: 30 min -1hr dry time and multitasking included
Supplies:
- Flat clear (you could use colored) rocks. Found these at Dollar Tree ::score::
- Cup of water
- Paint brush
- Sandpaper (that is the black block in the corner)
- Mod Podge
- Sissors
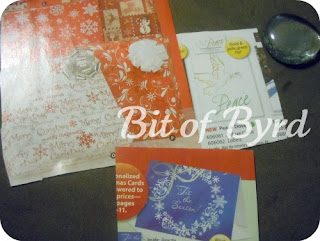
- Catalog or Ad or anything you want under a glass rock!
And something to watch while glue dries...
Fake points that you cant trade in for anything to the person who recognizes the show and character lol
I did the whole project in two episodes while uploading pictures to Facebook and doing another craft. So this is very easy and can be quick.
Step 1: Get your catalog, rock and scissors.
Step 2: Use your rock to troll the pages of the catalog for mini images that fit behind your rock.
An example of a Christmas card... Perfect!
That is what the rock would look like done.
::Side note:: The genius idea I had of using the catalog still impresses me because I was sad at not having a printer and thinking I would never get the size right... and this is recycling and free!
Think outside the box when looking at the catalog...
Wrapping paper ad... perfect!
Other ads to consider are the ones with sports products where they show all the teams. ::I use two of those further down::
Step 3: Cut out the images you like. But keep excess around the image.
I actually went through and cut out lots of images for different occasions and then sorted them in a baseball card organizer so I always have images on file if I need a rock quick
Step 4: Paint Mod Podge on the back of the rock and on the image. Go light on the Mod Podge. And then put rock on the image where you want. You can see your image for position if you arent too heavy on the MP.
I did a few
Step 5: Cut excess paper off around the rocks. Doesn't have to be exact.
Step 6: Paint a layer of Mod Podge on the back and let dry to the touch.
Step 7: Then sand paper the edges until you are smooth and have an even transition around the edge of the rock.
Step 8: Two more layers of Mod Podge and my trinkets are done.
I might have a back layer of solid paper to clean up the magazine. I havent decided yet.
Overall cost: less than a dollar.
I already have Mod Podge, and all the other supplies. The rocks came about 20 in a bag for a dollar. That is a reasonably priced craft!!!
If you'd rather buy them... the ones above can be purchased here.
I'd rather make my own... customize them... and not pay tax and shipping. :-)
If you ever make one of my projects let me know so I can add your picture to my fb page and link to you!


Comments
Post a Comment